The AIP scanner application requires an Azure app registration in order to obtain a token from Azure for interacting with the Azure Information Protection service endpoint. To configure this registration, you’ll need to follow these steps:
- Navigate to the Azure portal (https://portal.azure.com). Select Azure Active Directory (or Microsoft Entra ID) and then click App registrations.
- Select New registration.
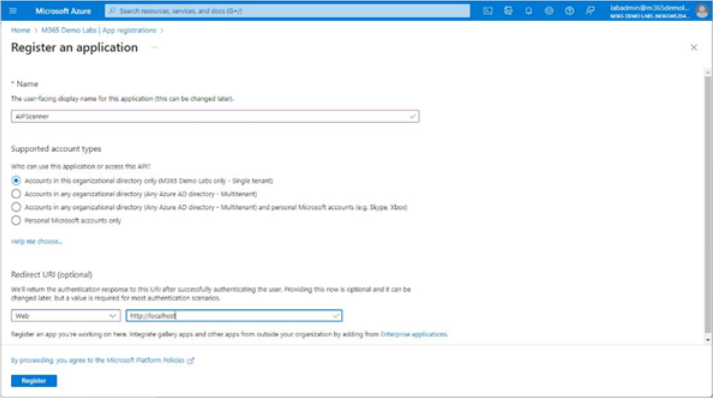
- Enter a name, such as AIPScanner.
- Under Redirect URI, select the platform as Web and enter http://localhost in the text box. See Figure 11.15:

Figure 11.15 – Configuring an app registration
- On the app’s Overview page, copy the Application (client) ID and Directory (tenant) ID values to a temporary storage location.
- Select Clients & secrets.
- Click New client secret.
- On the Add a client secret flyout, add a description and set an Expires date value of at least a year. Click Add.
- After the secret has been created, copy the Secret ID value to the temporary storage location containing the App ID and Directory ID values. These values will be used in the next section.
- On the API permissions page, select Add a permission.
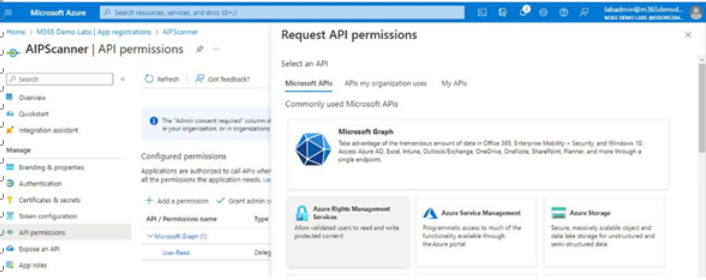
- On the Request API permissions flyout, select the Microsoft APIstab. Select Azure Rights Management Services. See Figure 11.16:

Figure 11.16 – Adding permissions on the Request API permissions flyout
- Select Application permissions.
- Expand the dropdown for Content. Select the Content.DelegatedReader and Content. DelegatedWriter checkboxes. Click Add permissions.
- Under Manage, select API permissions and then select Add a permission.
- On the Request API permissions flyout, select the APIs my organization uses tab.
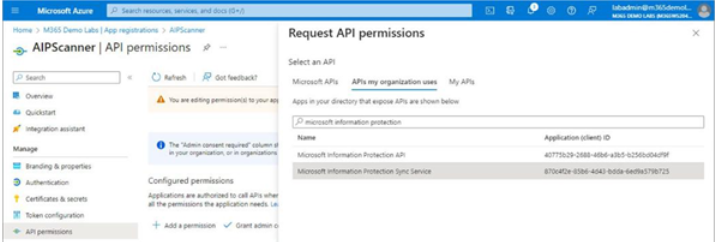
- Locate the Microsoft Information Protection Sync Serviceentry and select it. See Figure 11.17:

Figure 11.17 – Choosing the Microsoft Information Protection Sync Service API
- Select Application permissions.
- Select the checkbox for the UnifiedPolicy.Tenant.Read permission. Select Add permissions.
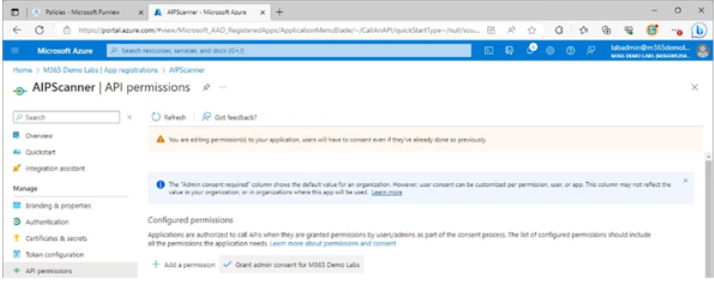
- On the API permissions page, click Grant admin consent for . See Figure 11.18:

Figure 11.18 – Granting admin consent
- Click Yes to confirm.
With your app registration and client secret details in hand, it’s time to install and configure the actual AIP scanner.