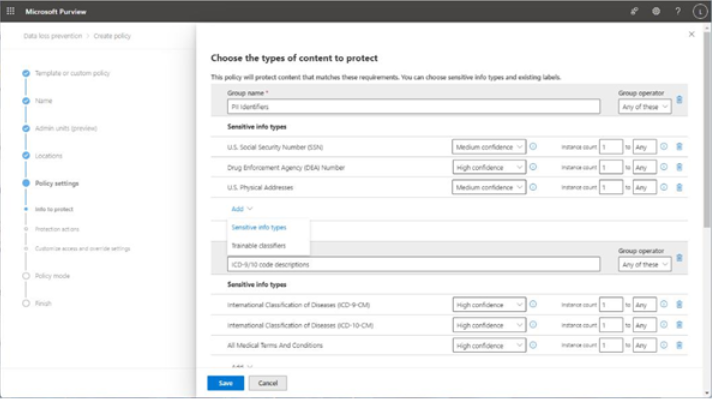
- When editing the DLP content matching rules, you can add sensitive information types and trainable classifiers to groups, as well as adjust the confidence and instance count requirements. By default, objects are joined with OR conditions (Any of these), but you can also set the join criteria to AND (All of these) to create more stringent requirements for detecting data. See Figure 11.6:

Figure 11.6 – Editing a DLP match rule
- Additional rule settings that you can modify from this page include alert notifications as well as allowing or prohibiting override conditions. If configuring aggregated alert thresholds, you can select the Send alert when the volume of matched activities reaches a threshold radio button and then set numeric values corresponding to the minimum number of instances or detections to trigger an alert and what the monitored time period is.
- Click Save once you’ve finished editing the rule conditions.
- On the Info to protect subpage, click Next.
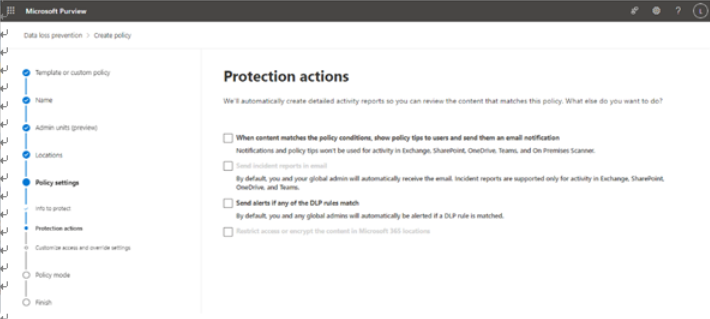
- On the Protection actions page, as shown in Figure 11.7, determine which options to enable.
Exam Tip
If you are customizing a default policy template (as opposed to creating an advanced DLP rule), you will not be able to select Restrict access or encrypt the content in Microsoft 365 locations. That feature is only configurable inside an advanced DLP rule at this time.

Figure 11.7 – Configuring protection actions
- For any of the supported options, you can customize the policy tip, email, and alert notifications. When you’re finished, click Next.
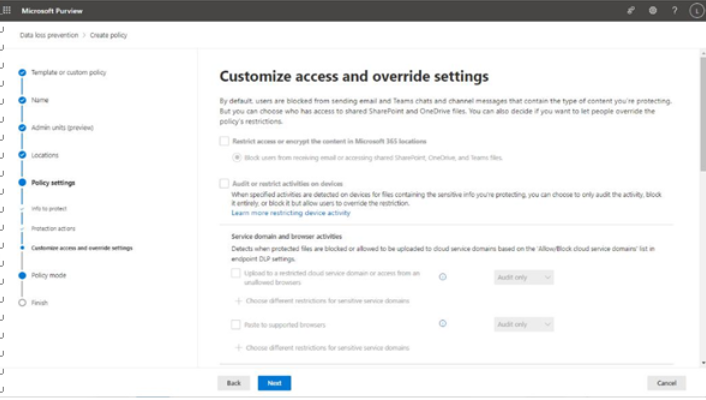
- On the Customize access and override settings subpage, as shown in Figure 11.8, edit any options. You may not be able to select options on this page depending on what locations or other options have selected. Auditing or restricting activities on devices, for example, is only available if you have the Devices location enabled for the policy.

Figure 11.8 – Customize access and override settings
- On the Policy mode page, choose the setting for policy enablement. You can choose Test it out first (sometimes referred to as Audit mode), Turn it on right away, or Keep it off. Click Next when you’re finished.
- On the Finish page, review the policy settings. Edit them if necessary, and then click Submit to configure the policy.
After choosing to turn on a policy, it may take up to an hour to be enforced across your tenant.
Power BI
DLP for Power BI includes many of the same features as standard policies, with the following exceptions and caveats:
• When creating a policy, you can only select the Custom category and policy template.
• You can only select the Power BI location in the policy. You cannot configure other locations in the same policy.
• DLP actions are only supported in workspaces hosted in Premium capacities.
• You cannot use trainable classifiers to identify data.
All other features and capabilities are supported.