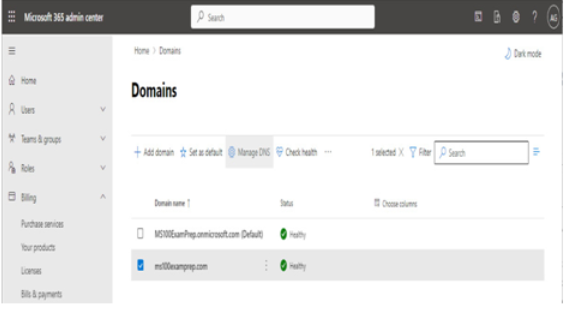
If you’ve opted to manage DNS records manually, you may need to go back to the Microsoft 365 admin center and view the settings. To do this, you can navigate to the Domains page in the Microsoft 365 admin center, select your domain, and then select Manage DNS:

Figure 1.12 – Managing DNS settings for a domain
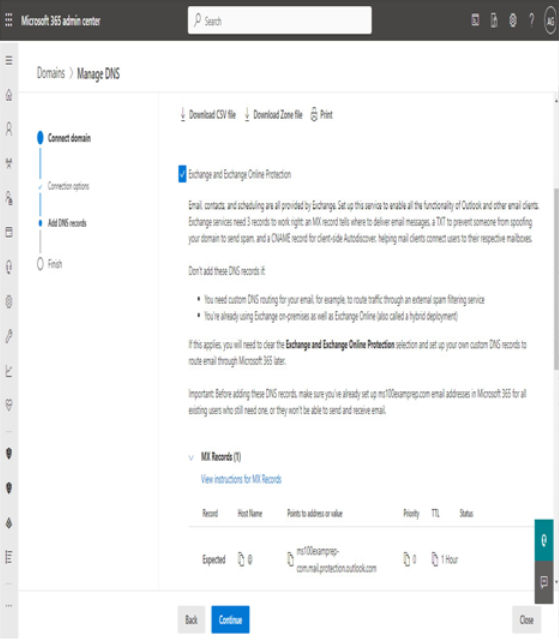
On the Connect domain page, click More options to expand the options, and then select Add your own DNS records. From here, you can view the specific DNS settings necessary per service by record type. You can also download a CSV file or a zone file that can be uploaded to your own DNS server.

Figure 1.13 – Viewing DNS settings
The CSV output is formatted as columns, while the zone file output is formatted for use with standard DNS services and can be imported or appended to BIND or Microsoft DNS server zone files.
Configuring a default domain
After adding a domain, Microsoft 365 automatically sets that first custom domain as the default domain, which will get used when creating new users. However, if you have additional domains, you may choose to select a different domain to be used as the default domain when creating objects.
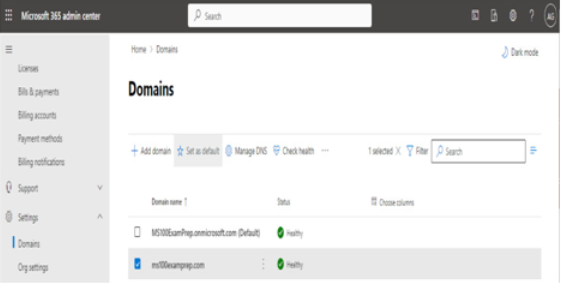
To manage which domain will be set as your primary domain, select the domain from the Domains page and then click Set as default to update the setting:

Figure 1.14 – Setting the default domain
The default domain will be selected automatically when creating cloud-based users and groups.
Custom domains and synchronization
When creating new cloud-based objects, you can select from any of the domains available in your tenant. However, when synchronizing from an on-premises directory, objects will be configured with the same domain configured with the on-premises object. If the corresponding domain hasn’t been verified in the tenant, synchronized objects will be set to use the tenant-managed domain.
Next, we’ll look at core organizational settings in a tenant.
Configuring organizational settings
Organizational settings, as the name implies, are configuration options that apply to the entire tenant. They are used to enable or disable features at the service or tenant level. In many instances, organizational settings are coarse controls that can be further refined by configuration settings inside each individual service.
To access the organizational settings, follow these steps:
- Navigate to the Microsoft 365 admin center (https://admin.microsoft.com).
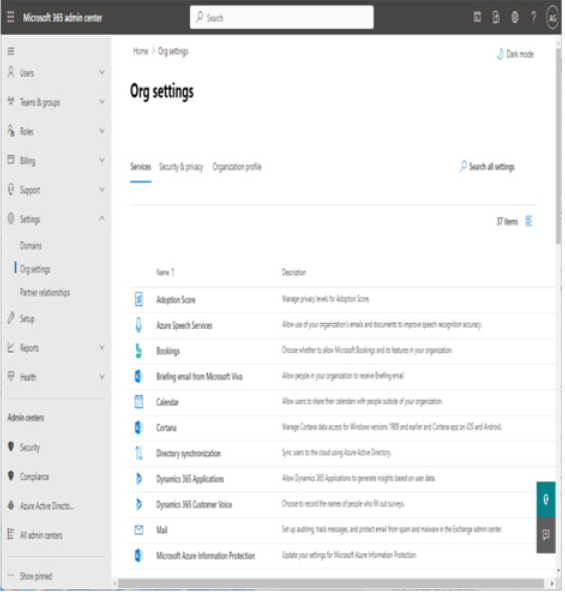
- In the navigation pane, expand Settings and select Org settings.

Figure 1.15 – Org settings in the Microsoft 365 admin center
The Org settings page has three tabs:
- Services
- Security & privacy
- Organizational profile
In the next section, we’ll look at the settings available in each of them.